Cheesy Bacon Egg Clouds

Greetings and happy spring, keto friends! I hope the sun is shining and the flowers are blooming where you are.

It’s been a while since I’ve done a breakfast recipe here. Recently, I’ve seen these “egg cloud” recipes posted to the r/Food subreddit, and they’ve been pretty popular. After trying the recipe myself, I’ve made a few revisions to spice them up a bit. Without further ado, here’s my recipe for cheesy bacon egg clouds:

egg cloud 4


What you’ll need:

  • 2 eggs
  • 3 slices of bacon
  • A sprinkle of grated parmesan cheese
  • A sprinkle of shredded cheddar cheese
  • Salt and pepper

Directions:

Step 1: Preheat oven to 400F.

Step 2: Fry up 3 slices of bacon in a pan. When finished, set aside and cut into small bite-site pieces.

Step 3: While your bacon is frying, crack 2 eggs into a mixing bowl. Separate the yolks and place them into a separate small bowl. Using a whisk or electric mixer, whisk the egg whites until they become fluffy and firm. The consistency should resemble whipped cream. This may take a few minutes.

Step 4:  Spray a small baking or casserole dish with non-stick spray/oil. When the egg whites are whisked and fluffy, spoon them on to the baking dish as one pile. This is your “egg cloud”.

Step 5: Using a spoon, form two small holes or “divots” in the egg cloud. Place your two egg yolks into the divots. Be careful not to break the yolks!

Step 6: Stick your bite-sized bacon pieces into the cloud wherever they will fit. Shove ’em anywhere!

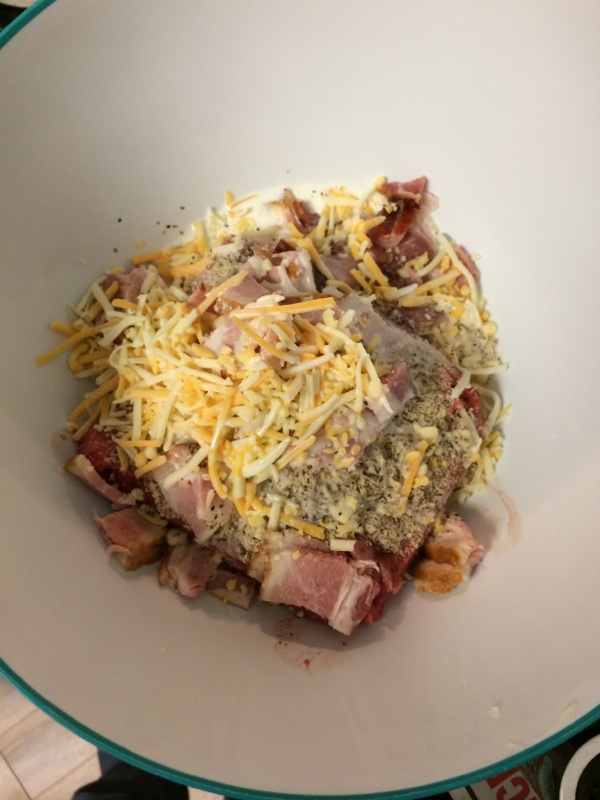
Step 7: Sprinkle your desired amount of parmesan and cheddar cheeses over the cloud. Lastly, sprinkle the cloud with dashes of salt and pepper. At this point, you should have something that looks like this:

egg cloud 1

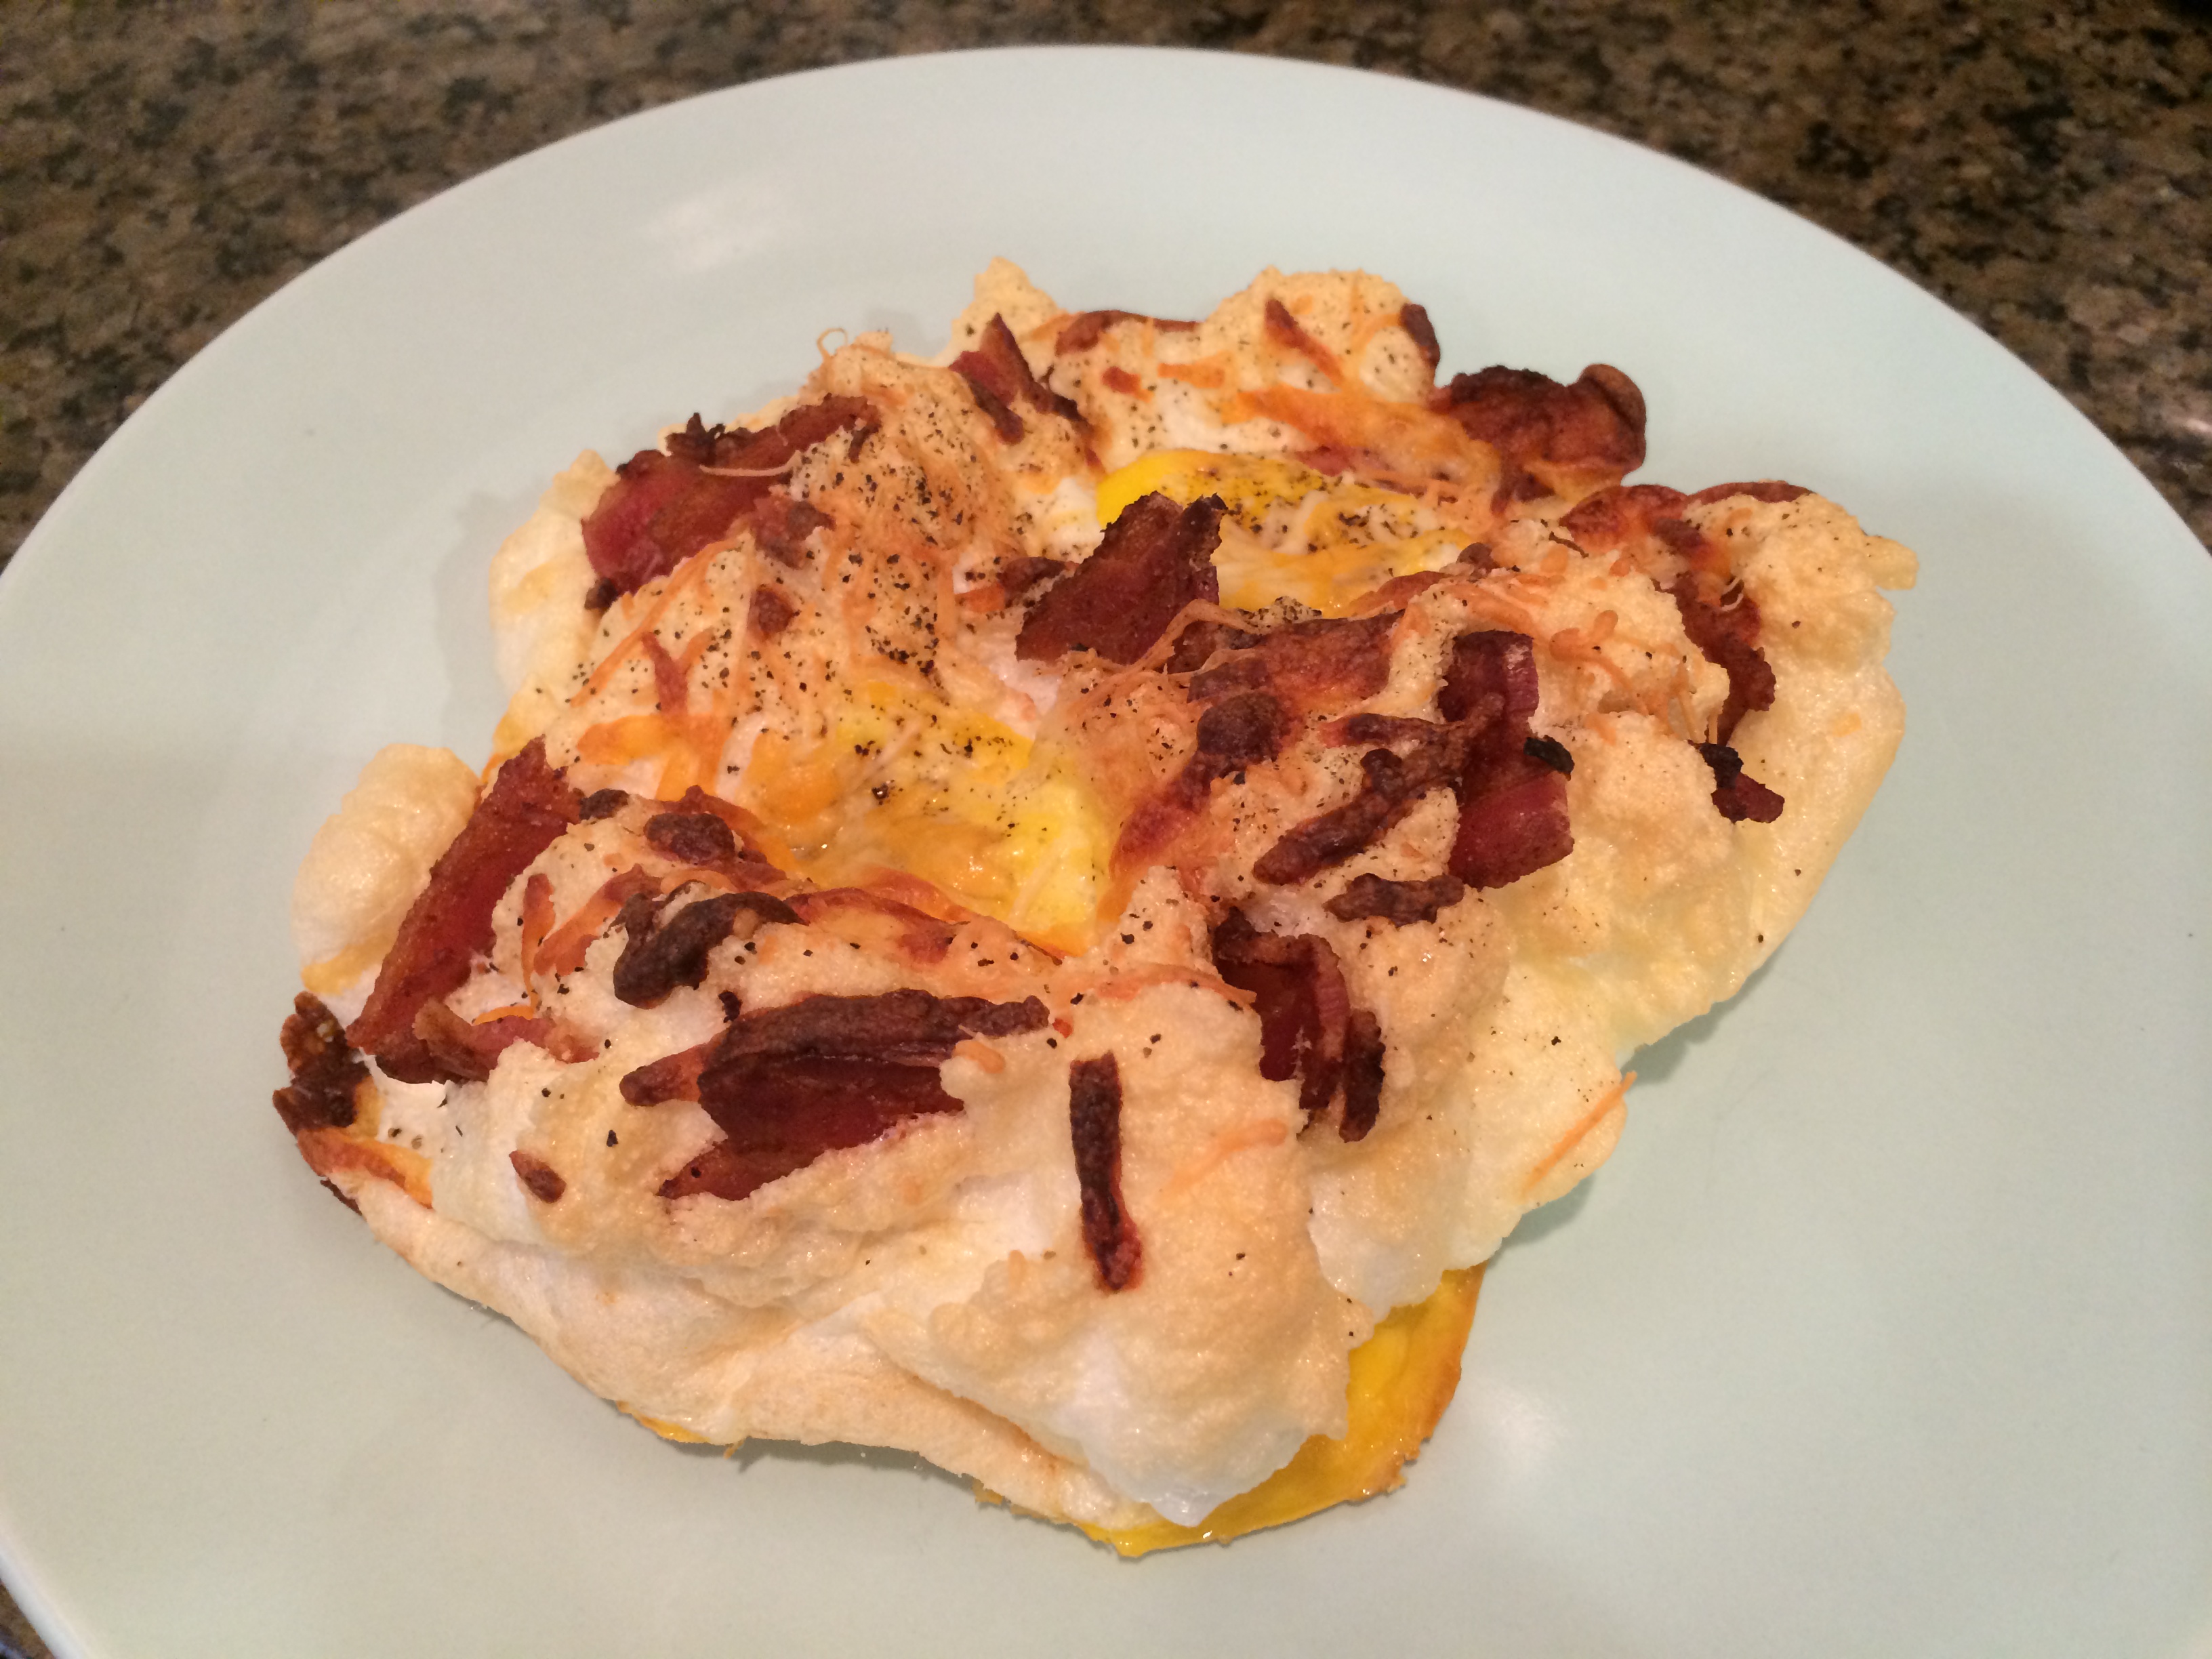
Step 8: Place into the 400F oven for 12-14 minutes. The egg cloud is finished when it becomes golden brown. Here’s the end result:

egg cloud 2 egg cloud 3

Enjoy! I personally love the texture of the baked egg whites. In a way, they’re almost dough-like. A little hot sauce or salsa would also be a great addition to this dish.

Nutrition facts: ~375 calories, 26g fat, 2g carbs, 28g protein

Raspberry Cheesecake – Keto / Low-carb and super easy!

Happy New Year, keto friends!

I trust that 2015 has been good to all of you so far. I know that the holidays can be rough as we’re all faced with the temptation of cookies, candies, and other hard-to-resist treats. Those temptations can be hard to avoid when it seems like all of your friends, family, and coworkers are indulging around you. So if you happened to stay strong and keto on through the holidays, then good for you! And if not? Well, let’s just get back on track and look forward with renewed focus.

Today, I thought I’d share with you a very simple dessert recipe. A recipe that is nearly impossible to mess up. Something quick and easy but very tasty: raspberry cheesecake!

There are plenty of ways to make a cheesecake, and let me preface this post with some breaking news: I am not a five-star chef. Shocking, I know. If there’s an easy way to cook something without losing any of the charm or appeal of the dish, I’ll go with the easy way. That’s what we’re doing here today.

cheescake1

What you’ll need:

For the crust:

  • 1 cup almond flour/meal (I use Bob’s)
  • 2 tbsp unsalted butter, melted
  • 1 & 1/2 tbsp Splenda or other zero calorie sweetener

For the filling:

  • 1 8-oz brick of cream cheese, softened
  • 2-3 tbsp sugar-free red raspberry preserves (I use Smucker’s)
  • 1-2 tbsp Splenda or other zero calorie sweetener

Directions: 

Step 1: Preheat oven to 400F.

Step 2: In a large mixing bowl, combine 1 cup of almond flour, 2 tbsp of melted butter, and 1 & 1/2 tbsp Splenda (or other sweetener). Using a standing or hand mixer, mix ingredients together until they are crumbly.

Step 2: Spray (or butter) a 6 or 8 inch baking dish well. Then, add the mixed crust ingredients to the dish and press them down into the dish with your hand. You want to create a firm crust base. Be sure to let the crust ride up onto the sides of the dish to create a pie-like crust.

Step 3: Place the crust into the oven and bake at 400F for 10-12 minutes or until the crust becomes golden brown. Be careful not to overcook as you don’t want the almonds to burn. When finished, remove the crust from the oven and set it to the side to cool completely.

Step 4: In a separate (and clean!) mixing bowl, combine 8 oz of softened cream cheese, 2 tbsp of sugar-free red raspberry preserves, and 1 tbsp of Splenda. Mix until the ingredients are completely combined. The filling should be smooth and the color will be pink from the preserves. At this point, taste a small sample of the filling. If you find it sweet enough, you’re good to go. Otherwise, consider adding another tbsp of preserves or sweetener until you are satisfied. It’s always easier to add more sweetener than it is to take it away.

Step 5: Pour the filling onto your cooled crust. Using a rubber spatula, spread the filling around evenly on top of the crust. Once finished, cover and place the cheesecake in your fridge for at least 2-3 hours for the filling to stiffen up again.

When all is said and done, here’s what a slice will look like:

cheesecake2

Note: This recipe serves 4-6 depending on how you slice the pieces. If you slice it 6 ways, each serving comes out to 276 calories, 25g fat, 4g carbs, and 6g protein!

Spicy Shrimp Over Cauliflower Mash

Howdy fellow keto warriors, and happy Halloween! I have returned from the dead again with another quick-fix recipe. Okay, so I wasn’t dead, but I have been pretty busy being a new parent. If you recall from my last post, my wife and I welcomed our first child (a boy) this past summer and most if not all of my free time has been devoted to him since he arrived. Have no fear though – I continue to keto on and today I thought I would drop one of my favorite recipes that has been keeping warm during these colder autumn months. Let’s take a look at spicy shrimp over a bed of cauliflower mash:

Shrimp cauliflower

One of my favorite keto discoveries has been cauliflower mash. I’m a starch fan true and true, but finding a suitable cauliflower mash recipe was great because I could finally give in to my mashed potato cravings without actually eating mashed potatoes. And while I typically pair my cauliflower mash with steak or chicken, I decided to get a little crazy and serve it with spicy shrimp this time around. Absolute success.

There are a variety of solid cauliflower mash recipes to pick from these days, but let me save you some time and provide you with my absolute favorite:

I Breathe I’m Hungry – Garlic & Chive Cauliflower Mash

I can’t recommend it enough. Of all the mash recipes I’ve tried, this one comes the closest to looking, feeling, and tasting like mashed potatoes. Obviously, you’re still going to taste the cauliflower – but it really feels like eating mashed potatoes.

So, step one is to make the above recipe. You’ll need an entire head of cauliflower, some mayonnaise, a garlic glove, salt, pepper, lemon juice, and some chives. While you are preparing that recipe, get to work on your spicy shrimp. For that, you’ll need the following:

To prepare the spicy shrimp:

Step 1: Place a sauce pan over medium heat and melt the 2 tbsp of butter.

Step 2: Once the butter is melted, toss the entire 16-oz bag of raw shrimp into the pan. Make sure that the shrimp have been peeled and thawed.

Step 3: Sprinkle the shrimp with small dashes of salt and pepper. Continue to cook over medium heat, stirring occasionally, until the shrimp becomes pink, about 4-6 minutes.

Step 4: Squirt your desired amount of Sriracha sauce directly into the pan and over the shrimp. Start with a small amount, knowing that you can increase the amount for additional spice if needed. I went with about 2 tbsp of sauce.

Step 5: Toss and stir the shrimp and sauce for another 1-2 minutes before removing the pan from the heat.

When you are finished with the cauliflower mash, simply scoop the mash into a bowl and top with your spicy shrimp. Devour, and enjoy.

Grilled Pork Chops and Bacon Brussels Sprouts

Howdy readers! Long time no see. First off, I’d like to apologize for having not made a new post in over a month. My wife recently gave birth to our first child – a boy – born on July 2nd. As I’m sure you can understand, all of my attention and time has been devoted to learning how to take care of the little guy since he arrived. It’s been a wild ride so far, and we’re only just getting started! Things are starting to calm down now though, and because of that I can finally return to Complete Keto to share more recipes with you.

We’re in the middle of summer right now (the temperature is a hot and humid 90 degrees in Minneapolis today), so I thought I would share one of my favorite summer recipes. When I think of summer food, I think of grilling. A few days ago, I decided to forgo steak and chicken and opted to grill up some pork chops instead. Pork chops are often cheaper than steak and can also offer a great fat content as well. As a note, I always prefer to grill bone-in pork chops. I find great joy in channeling my inner-caveman and chewing meat right off of the bone.

For a side dish, I went with one my favorite vegetables – brussels sprouts. But not just plain old boring brussels sprouts. After all, this is Keto food that we’re talking about here. No, I went with bacon brussels sprouts. I mean, what goes better with pork chops than bacon?

My dinner, prepared:

Processed with VSCOcam with c1 preset


Let us waste no more time. Here’s the recipe.

What you’ll need:

  • 2 pork chops (I prefer bone-in, but boneless chops work great as well)
  • 1 bag of shredded brussels sprouts
  • 4 slices of bacon
  • Salt & Pepper
  • Worcestershire sauce
  • Lemon juice (optional)

For the pork chops:

Step 1: Lay the pork chops down on a large plate and dash a couple of tablespoons of worcestershire sauce on them. Be sure to turn the chops over and dash the sauce on both sides. Let the sauce rest on the meat for 10-15 minutes. Then, sprinkle the pork chops with your desired amount of salt and pepper.

Step 2: Heat up your grill. Aim for medium/high heat. I heated to about 350 degrees F on my gas grill.

Step 3: Toss the pork chops on the grill. Cook on one side for roughly 5 minutes. Then, turn them over and cook on the other side for about 4 minutes. When grilling pork chops, be sure to cook them until the center is no longer pink. The center should be cooked to 145 degrees F (63 degrees C). I took mine off of the grill when they looked like this:

chops

Look at those beautiful grill marks!

Step 4: Set the pork chops to the side for at least 5 minutes to let the juices redistribute while the meat cools.

For the Bacon Brussels Sprouts:

Step 1: Heat a large pan over medium heat.

Step 2: Slice the bacon strips into one-inch “bite size” pieces. Toss the bacon strips into the pan.

Step 3: Cook the bacon until it is lightly browned, about 3-4 minutes.

Step 4: Add the bag of shredded brussels sprouts to the pan. Stir the brussels sprouts with the bacon, allowing for the bacon grease to cover the sprouts:

bacon sprouts

Step 5: Cook the bacon and brussels sprouts together for another 3-4 minutes or until the bacon in the pan is crispy.

Step 6 (OPTIONAL): Squeeze a light amount of lemon juice over the pan. Sprinkle pepper if desired. The bacon will naturally add saltiness to the dish, but feel free to sprinkle additional salt if desired.

Processed with VSCOcam with c1 preset

Enjoy!


Low Carb Chicken Chili

I’ve always thought of chili as more of a winter dish, especially as someone who endures arctic Minnesota winters. On those cold and dreary days, a piping hot bowl of chili warms my stomach like no other. This week however – in the middle of a humid week in June – I had a sudden craving for a bowl of chili. While the weather has been hot, we’ve had a rainy and cloudy week which probably kicked this craving into gear. But instead of reverting to my classic recipe, I decided to switch things up a little bit. This time around, I decided to substitute chicken for ground beef. And in an attempt to make this dish low-carb friendly, we’re going to use black soy beans instead of standard pinto and chili beans. Side note: Have you tried black soy beans yet? A 1/2 cup of these magical beans contains only 1g net carbs, making them keto-friendly for a variety of dishes. Be sure to pick some up for your chili, salsa, salad and soup recipes. Alright, now let’s get to it:

low carb chicken chili

 What you’ll need:

  • 2 boneless, skinless chicken breasts
  • 1 onion
  • 2 cloves of garlic
  • 1 8-oz can of tomato sauce
  • 1 10-oz can of diced tomatoes and green chilies
  • 2 15-oz cans of black soy beans (such as these) *Also can be found at high-end markets like Whole Foods
  • 2 tbsp butter
  • 1 tbsp olive oil
  • Ground red cayenne pepper
  • Chili powder
  • Salt
  • Pepper
  • Shredded cheese of your choice
  • Sour cream

Directions:

Step 1: Mince 1 onion and 2 garlic gloves. Then, heat 2 tbsp butter in a large pot over medium heat. As the butter melts, add the minced onion and garlic. Cook for a few minutes until the onions are softened.

Step 2: Cut 2 chicken breasts into small, 1-inch size pieces. Add the chicken to the pot along with 1 tbsp of olive oil. Sprinkle a desired amount of salt and pepper into the pot. Let the chicken cook until it is lightly browned.

Step 3: Add the 8-oz can of tomato sauce and let the pot cook for a few minutes.

Step 4: As the sauce begins to boil, add the can of diced tomatoes & green chilies and both cans of black soy beans.

Step 5: Add desired amounts of ground red cayenne pepper, chili powder, and salt. Stir all ingredients to combine. Cover the pot and let it cook for at least 45 minutes, but preferably up to 1 hour.

Step 6: Before serving, taste-test the chili and add more spices if you desire.

Step 7: Serve with a sprinkle of shredded cheese and a scoop of sour cream. Looking for even more flavor? Add cilantro and a squeeze of lime juice.

Enjoy!

*Note: This chili should be relatively thick. If you prefer yours to be less-thick, consider adding 3/4 cup water or chicken broth when adding the can of tomato sauce. 

Keto/Low-Carb Spicy Crispy Chicken Strips

Oh boy, do I love crispy fried chicken. The only problem is, the standard flour breading means that we can’t eat it on a low-carb diet. So in my search for a way to make a keto-friendly version of this classic meal, I decided to turn to crushed pork rinds as a substitute for bread crumbs. Today, I will share you with my recipe for a low-carb (and spicy!) version of crispy chicken.

keto crispy chicken 2

What you’ll need:

  • 3 boneless, skinless chicken breasts (thawed)
  • 1  4-oz bag of spicy pork rinds/chicharrones (such as Mission’s Picante flavor, typically found at Target or Walmart)
  • 2 eggs

Directions:

Step 1: Preheat your oven to 400F.

Step 2: Using a blender or food processor, blend the entire bag of pork rinds until they look like bread crumbs. Once the pork rinds are crushed, pour them onto a plate. They should look like this:

crushed pork rinds

Step 3: Crack the eggs into a small bowl and whisk the eggs until they are completely mixed.

Step 4: Cut the chicken breasts into slices that are about 1 inch wide and 2-3 inches long. Make them look like chicken strips!

Step 5: One at a time, begin to dip the chicken strips into the egg mixture. After fully coating the chicken strip in egg, place the chicken strip on top of the crushed pork rinds and roll the strip around until it is completely covered in the pork rind coating.

Step 6: Place the coated chicken strips into an oven-safe baking dish, like this:

keto crispy chicken

Step 7: Place the chicken strips into the 400F oven for 30 minutes.

After 30 minutes, take the dish out of the oven and take a look at your low-carb, spicy, crunchy, cripsy, savory chicken strips! Dip the chicken strips in ranch or blue cheese dressing and enjoy:

keto crispy chicken 2

Keto Quick Fix: Buffalo Chicken Salad

Every now and again, I’ll do my best to provide you with a quick, easy, and effortless “quick fix” recipe which calls for few ingredients and minimal preparation. Today, let’s take a look at one my favorite quick fixes – Buffalo Chicken Salad:

buffalo chicken salad

What you’ll need:

  • 2-3 cups salad of your choice (I prefer sweet butter lettuce)
  • 1 chicken breast
  • 1/2 cup shredded cheese of your choice
  • Buffalo wing sauce of your choice (I always recommend Frank’s)
  • Ranch or Blue Cheese dressing

Preparation is simple. Just drench the chicken breast in the buffalo wing sauce and bake at 400F for 20-25 minutes. For the last 5 minutes in the oven, sprinkle on your desired amount of cheese and let it melt all over the chicken. When the chicken is finished, slice it and lay it on a bed of lettuce. Pour some of your salad dressing on top and enjoy. Couldn’t be easier!

Keto Cheesy Meatloaf Poppers

Meatloaf is one of those classic home-cooked meals that I grew up on. The only drawback with meatloaf on a low-carb diet is that most recipes call for a significant amount of bread crumbs. But that’s not going to stop us, is it? It just so happens that almond flour (which is quite keto-friendly) is a great substitute for bread crumbs in most meatloaf recipes.

I try to get creative with “classic” recipes whenever I can, just to mix things up whenever possible. I recently started to get creative with my low-carb meatloaf recipe as well. Rather than molding one large loaf like I normally would, I decided to make meatloaf “poppers” instead. These look and feel more like Italian meatballs, but they retain the classic meatloaf taste that you’ve come to love. To top it off, I like to add cheese and bacon to really spruce up the taste into something slightly more exciting. I now present to you, Keto Cheesy Meatloaf Poppers:

keto meatloaf 5

What you’ll need:

  • 1lb Ground Beef (I recommend 80/20 or 85/15)
  • 3 Slices of Bacon, cut into 1-inch size pieces
  • 1 Egg
  • 3/4 Cup Almond Flour
  • 1/3 Cup Shredded Cheese (I recommend Colby-Jack)
  • 1/3 Cup Half-n-Half
  • 2 tsp Salt
  • 1 tsp Pepper
  • 1 tsp Onion Powder

Directions:

Step 1: Preheat your oven to 350F. While waiting for the oven to heat, place all of the above ingredients into a large mixing bowl. When combined, it’ll look like this:

keto meatloaf 1

Step 2: Using your hands, mix the ingredients together completely. Don’t be afraid to mush and mash the meat, almond flour, egg, and cheese together with your fingers. Mix it well!

Step 3: Begin to take small handfuls of the raw meatloaf mixture and roll them into small balls – about the size of a golf ball, if not slightly larger.

Step 4: Grab a cupcake/muffin tin and spray with non-stick cooking spray. Place the meatloaf “poppers” into a cupcake/muffin tin, like this:

keto meatloaf 2

Step 5: Place the tin into your 350F oven and cook for 30 minutes. When finished, they should look like this:

keto meatloaf 4

keto meatloaf 3

Let the poppers sit for 5-10 minutes before serving. I recommend dipping them in reduced-sugar ketchup or ranch dressing and serving with a side of cauliflower mash. My current favorite cauliflower mash recipe can be found here. Enjoy!

Sugar Free Orange Cream Jello

Last week, I published a post about the possible benefits of adding gelatin to your low-carb/keto diet. So whether you’ve decided to introduce jello to your diet or even if you’ve been a long time fan of the bouncy goodness that is jello, this recipe is for you.

Sugar-free jello has been one of my go-to desserts for quite some time now. It is stunningly low in calories, high in sweetness, and quite cheap – often sold for about a dollar per box. Here are the nutrition facts for one box of sugar-free orange jello:

sugar free jello nutrition label

After making the plain old basic jello recipe dozens and dozens of times, I recently decided to spruce up this old favorite by adding a little bit of extra flavor and creaminess to it. I decided to combine my childhood love of orange creamsicles with my new-found love of sugar-free jello.

Your standard sugar-free jello recipe calls for the following ingredients:

It doesn’t get any easier than that. You simply mix the 1 cup of boiling water with the entire packet of gelatin mix and stir for about two minutes. Once the mix has dissolved, you stir in the 1 cup of cold water.

I completed the first step (mixing boiling water and jello mix) as instructed. On the next step however, I combined a 1/2 cup of cold water and a 1/2 cup of half-n-half. That was literally the only change I made. I mixed in the water and half-n-half combination for about a minute and then tossed the bowl into the refrigerator for 4 hours.

The final product looked like this:

orange cream jello 1

A closer look at one serving:

orange cream jello 2

Just as you’d expect, the half-n-half adds a creamsicle-type flavor to the jello. Not only that, but the half-n-half also gives you a few added grams of fat which may be useful in hitting your macros.

Remember, sugar-free jello is available in just about every flavor including strawberry, cherry, raspberry, lime, and more. I imagine that adding half-n-half will do just fine in any of the flavors!

Perfect and Easy Oven Roasted Turkey Legs

When someone asks me what my favorite holiday is, I always tell them Thanksgiving. For me, Thanksgiving is the perfect mixture of friends, family, and food. I have no shame in admitting that I squeal in delight when the beautiful golden-brown turkey makes it way to the table. And while many of my family members fight over the white breast meat, I always go straight for the legs. I’m a dark meat type of guy, and nothing channels my inner caveman more than using my hands and chomping down on the leg of a turkey.

Now, I am of the belief that there’s no reason to eat roasted turkey once a year. Whenever I’m feeling tired of chicken or beef, I always head to my grocery store in search of something that will change up my protein game for a few days. Some days it’s lamb, other days it’s pork. Yesterday, it was turkey.

As I was glancing through the meat section, I came across an unbeatable deal on turkey legs. Take a look:

turkeyleg1

Two beautiful, meaty turkey legs for $4.88. You just can’t beat that! It’s almost $10 to get a single turkey leg at the State Fair, so I knew that I wasn’t going to pass this deal up. I decided to bring those legs home and cook them for dinner that night.

If you’re like me, you prefer recipes that are not only quick and easy, but also effective. Roasting turkey legs is just that – easy and effective. Let’s not make it harder than it has to be.

Today, I’ll tell you how to roast the perfect turkey leg with only 3 ingredients. Let’s get started:

What you’ll need:

  • Turkey legs
  • Salt
  • Pepper
  • 1/2 Stick of Butter (softened at room temperature)

Directions:

Step 1: Preheat your oven to 350F. While waiting for the oven to heat, remove your turkey legs from the package and rinse them under cold water. When finished, pat the turkey legs dry with a paper towel and place them on a plate or cutting board:

turkeyleg2

Step 2: Take your softened, room-temperature butter and spread the butter all over the turkey legs using your hands. Massage the butter into the turkey meat and under the skin if possible. Try to cover the turkey legs with even amounts of butter, being sure to use only as much butter as needed. When finished, the legs should look like this:

turkeyleg3

Step 3: Sprinkle your desired amount of salt and pepper onto the turkey legs. Be sure to cover the legs evenly with salt and pepper:

turkeyleg4

Step 4: Place the turkey legs onto a wire rack over a baking/roast pan. This method is useful to catch the turkey drippings. I actually use a cooling rack and a cake pan:

turkeyleg5

Step 5: Place the turkey legs into your 350F heated oven. Cook for 45 minutes and then flip the turkey legs over to cook for an additional 45 minutes. Total cook time is 90 minutes. After 90 minutes, the turkey legs should come out looking like this:

turkeyleg6

Mmm…golden brown turkey legs with crispy skin to boot! Pro-tip: Use a meat thermometer to measure the heat in the center of the turkey leg, which should be 180F. If the center of the turkey leg is not 180F, place them back in the oven for another 10-15 minutes and try again.

When you do remove the legs from the oven, be sure to let them stand and cool for at least 10 minutes. Not only will they be piping hot, but leaving them to stand before eating allows the juices to redistribute throughout the meat, leaving you with more succulent and tender turkey legs.

Now stop waiting for Thanksgiving and go find yourself some turkey legs to roast!